"Home Made" holography components
"Home Made" holography components
Nice one Jeff ! I have used that note book plastic for my muliplexer machine as its nice and rigid stuff (genius using the antenna w/shrink tubing Jeff!). I too have some components that are a bit more complex i will be showing soon..................
-
Tommy
"Home Made" holography components
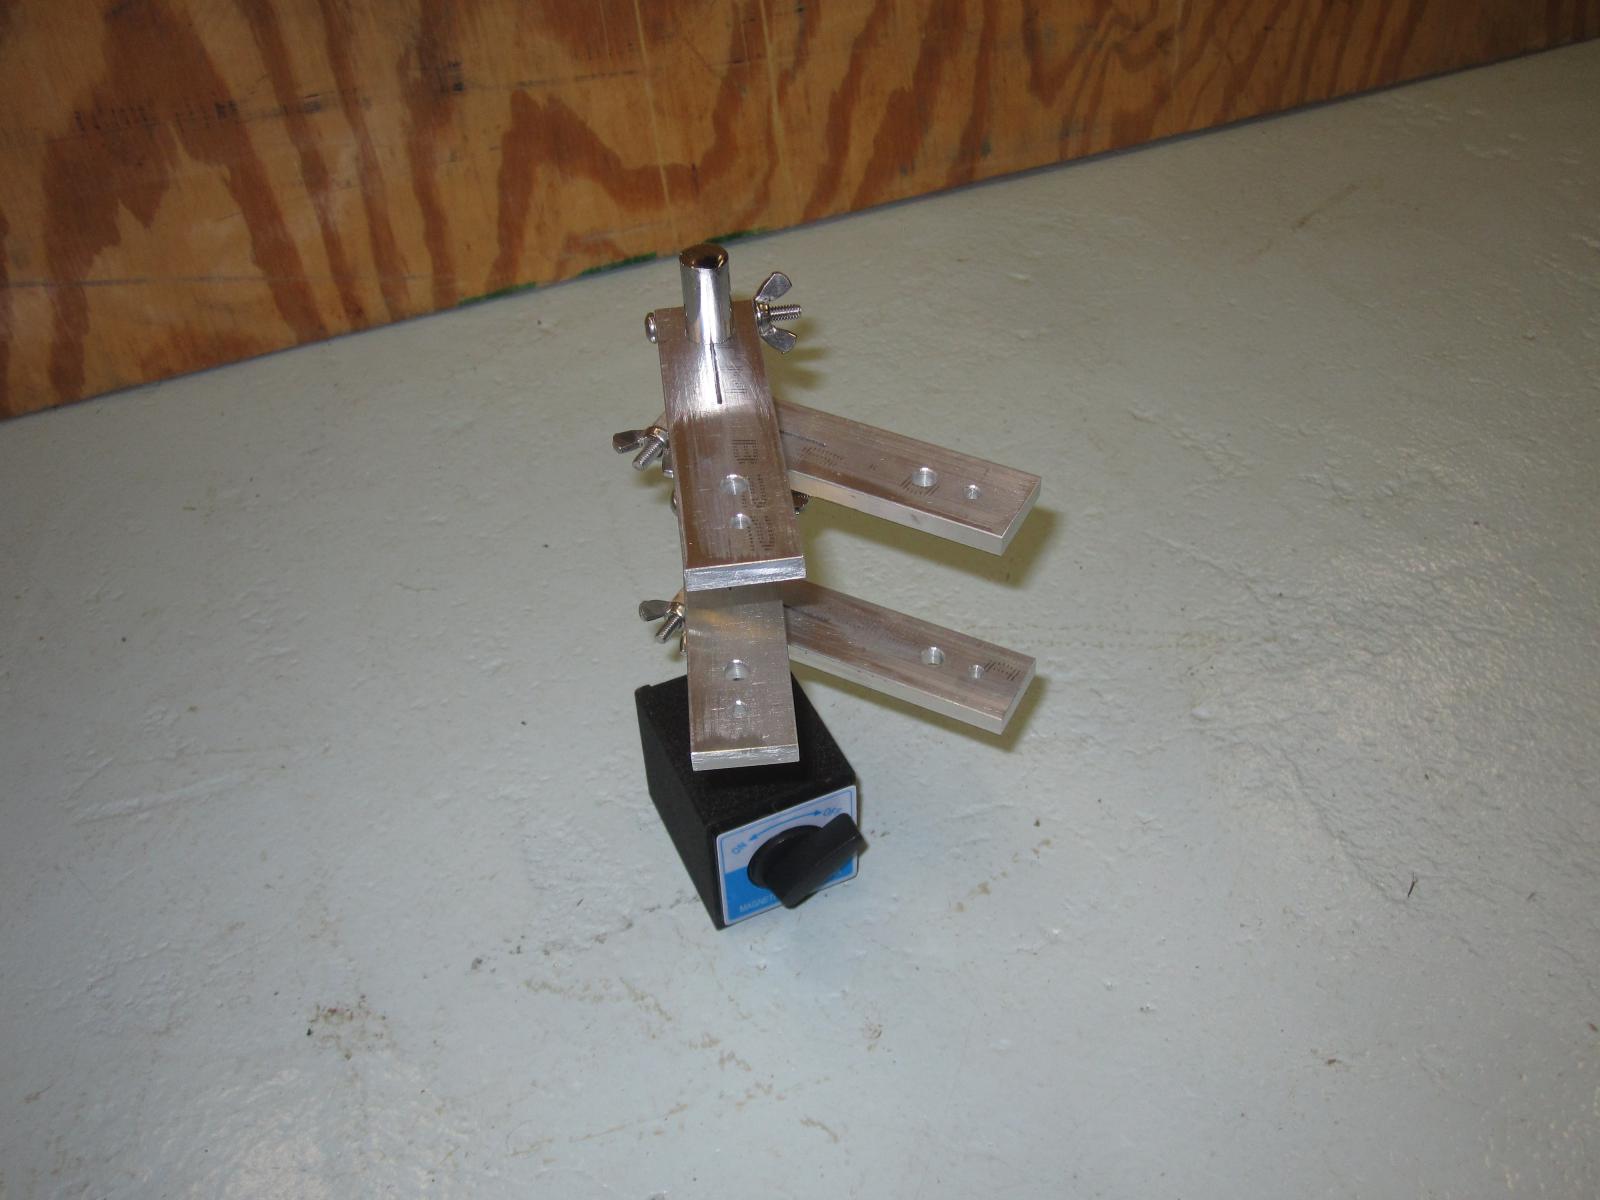
I made some brackets to hang onto indicator stands...
Its a piece of 1 by 1/4 inch aluminum bar. Drill a hole one one end which fits the indicator stand, and then a couple of holes on the other end for whatever the optics have. I put in a 1/4" and a number 8 machine screw hole. Slit the aluminum with a hacksaw to turn the indicator stand hole into a C shape. Then kept cutting for another inch or so, to make it easier to clamp on. Finally drill a hole the long way through the bar for a tightening screw. The tightening screw's hole is threaded on the end with the screw head, so the screw tightens into the bar. The other end is not threaded, so a wing nut can clamp the bar onto the indicator stand.
A picture makes more sense:
http://www.bobdbob.com/~tjohnson/lab/20 ... 86.JPG.jpg
"Home Made" holography components
Tommy nice and clean! What will be the final use for these ?
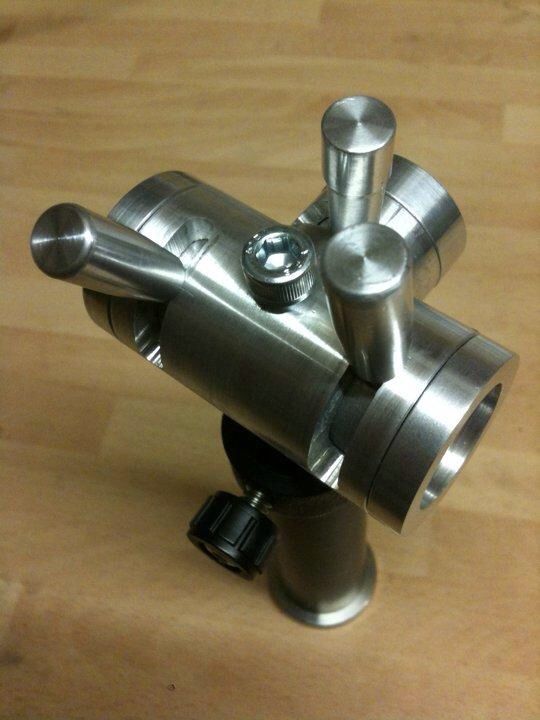
Here a component i made recently, It's a Variable Output Beamsplitter. Solid brass and works great i really needed to make some wave plate rotators for my RGB system so i figured with a little bit more work i could put that tiny cube to good use !
Here a component i made recently, It's a Variable Output Beamsplitter. Solid brass and works great i really needed to make some wave plate rotators for my RGB system so i figured with a little bit more work i could put that tiny cube to good use !
- Attachments
-
- micro-VOBS1
"Home Made" holography components
I forgot to add, to see its scale, notice its sitting on a large coin !
-
Jeffrey Weil
"Home Made" holography components
Hello Everyone,
I'm surprised this thread isn't more popular. I thought there would be a lot more posts by now.
This time I'm posting something that takes more tooling to make than the aperture I posted before. This one takes a milling machine, and a decent sized one too.
Since I'm doing rainbows, some of the time I move the reference beam and sometimes the object to get my colors. This part is for when I'm moving the ref beam.
I have a few of the micro components from Newport, one is on my final reference mirror before the spatial filter. This is a better dovetail rail than you can buy from them, and cheaper. It's also faster as I can make one in a few hours, and that includes picking up the metal.
I used to have my final mirror on a standard mag base and pole and would move it between exposures using registration on the table to keep it consistent. A pretty poor way of doing things. It's not reliable and also a pain to deal with.
I had taken some of their way too thin rails and bolted them to the top of 1x3 solid aluminum bar to stiffen them up for other optics in the past, but one over a foot long was expensive. It's also an ugly way of doing things when you have the tools to do it better.
So, I cut the same profile as the Newport dovetail right into the 1x3 aluminum. The worlds most heave duty micro rail.
Jeff W
I'm surprised this thread isn't more popular. I thought there would be a lot more posts by now.
This time I'm posting something that takes more tooling to make than the aperture I posted before. This one takes a milling machine, and a decent sized one too.
Since I'm doing rainbows, some of the time I move the reference beam and sometimes the object to get my colors. This part is for when I'm moving the ref beam.
I have a few of the micro components from Newport, one is on my final reference mirror before the spatial filter. This is a better dovetail rail than you can buy from them, and cheaper. It's also faster as I can make one in a few hours, and that includes picking up the metal.
I used to have my final mirror on a standard mag base and pole and would move it between exposures using registration on the table to keep it consistent. A pretty poor way of doing things. It's not reliable and also a pain to deal with.
I had taken some of their way too thin rails and bolted them to the top of 1x3 solid aluminum bar to stiffen them up for other optics in the past, but one over a foot long was expensive. It's also an ugly way of doing things when you have the tools to do it better.
So, I cut the same profile as the Newport dovetail right into the 1x3 aluminum. The worlds most heave duty micro rail.
- tworails.jpg (28.38 KiB) Viewed 5884 times
-
holorefugee
"Home Made" holography components
I don't have time to draw a beam dump but I do have an optical drawing that includes a not to scale beam dump. The beam would be small er and the box would be larger.
- Attachments
-
"Home Made" holography components
It's taken me a while to get around to uploading this, but here's a beamsplitter I made last year. It has a PBS cube in the middle and a half wave plate on the input side as well as the two outputs. Covers all eventualities 
The levers allow for full adjustments. It's now been painted matt black to avoid reflections.
The levers allow for full adjustments. It's now been painted matt black to avoid reflections.
"Home Made" holography components
Thanks!holorefugee wrote:I don't have time to draw a beam dump but I do have an optical drawing that includes a not to scale beam dump. The beam would be small er and the box would be larger.
"Home Made" holography components
I really like these because they don't require extensive metalworking skill and can be made with simple tools.Tommy wrote:I made some brackets to hang onto indicator stands...
Its a piece of 1 by 1/4 inch aluminum bar. Drill a hole one one end which fits the indicator stand, and then a couple of holes on the other end for whatever the optics have. I put in a 1/4" and a number 8 machine screw hole. Slit the aluminum with a hacksaw to turn the indicator stand hole into a C shape. Then kept cutting for another inch or so, to make it easier to clamp on. Finally drill a hole the long way through the bar for a tightening screw. The tightening screw's hole is threaded on the end with the screw head, so the screw tightens into the bar. The other end is not threaded, so a wing nut can clamp the bar onto the indicator stand.
A picture makes more sense:
http://www.bobdbob.com/~tjohnson/lab/20 ... 86.JPG.jpg